- Home
- Getting started
-
Modules
- General info
- Accordion
- Blog card
- Box over image
- Button
- Column navigation
- Compact card
- Comparison table
- Contact box
- Content card
- Cover card
- Feature card
- Features showcase
- Form
- Gallery
- Go card
- Heading
- Hero slider
- Icon
- Image
- Image box
- Image plus text
- Language selector
- Listing
- Logos
- Mobile navigation
- Modal
- Multi address
- Navigation
- Numbers
- Pillar navigation
- Pricing
- Properties
- Quick action
- Quick features
- Quote
- Review
- Rich text
- Scroll to
- Section extra settings
- Section intro
- Sharing
- Shifter
- Side menu
- Site search
- Steps
- Tabs
- Team card
- Timeline
- Video
- Blog configuration
- Articles
- Changelog
-
- License
- Support policy
- Refund policy
How to add global content to the blog sidebar
Important update!
Starting with Version 31, you can use the newer blog template that includes all previous blog designs and many more options, including an easier way to add a custom global sidebar. You can learn more about this new template on our changelog, how to set it up, and the new Blog configuration here.
If for any reason you don't want to switch to the new template, please continue reading this article. This article doesn't apply to the new blog template.
For the old blog template (before Version 31), please read on:
Important notes!
This guide assumes you have already followed our recommendation to create and use a child theme for your website.
We didn't include global content to the blog sidebars (except the generic sidebar on the Blog 4, that lists common blog widgets) because you are allowed to use the same template for multiple blogs, so this global content is more likely part of that particular blog, than something that belongs to all blogs using that template (e.g., an About Our Blog section, a global Call-to-Action, etc.).
The following guide explains how to create a global partial that includes a drag and drop area, where you can add modules in your blog sidebar; and how to clone your blog template and include this global partial. You will use this blog template for your specific blog. For other blogs that need a different global sidebar, you will again need to clone and use a different template with a different global partial, but the process is practically the same.
By design, Blog 1, Blog 2 and Blog 3 have sidebars only on the blog post, not the listing view. So, you will only need to clone and edit the post templates. For the Blog 4 template, where a generic sidebar with common blog widgets is already included, you will have to include your global partial on both, the listing, and post templates, so in this case you will need to clone both.
To make it easier for you, starting with Version 16, we have updated the blog templates and included HubL comments to show you where you can include your global partials. We'll refer to them later in this guide.
TL;DR — Here is a quick video demonstrating all this process.
1. Clone the blog template to your child theme
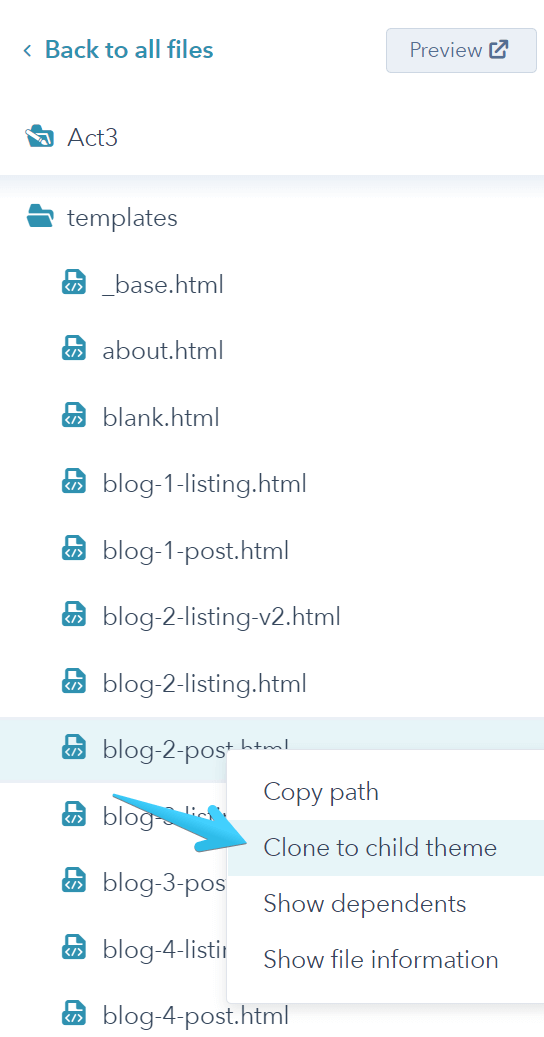
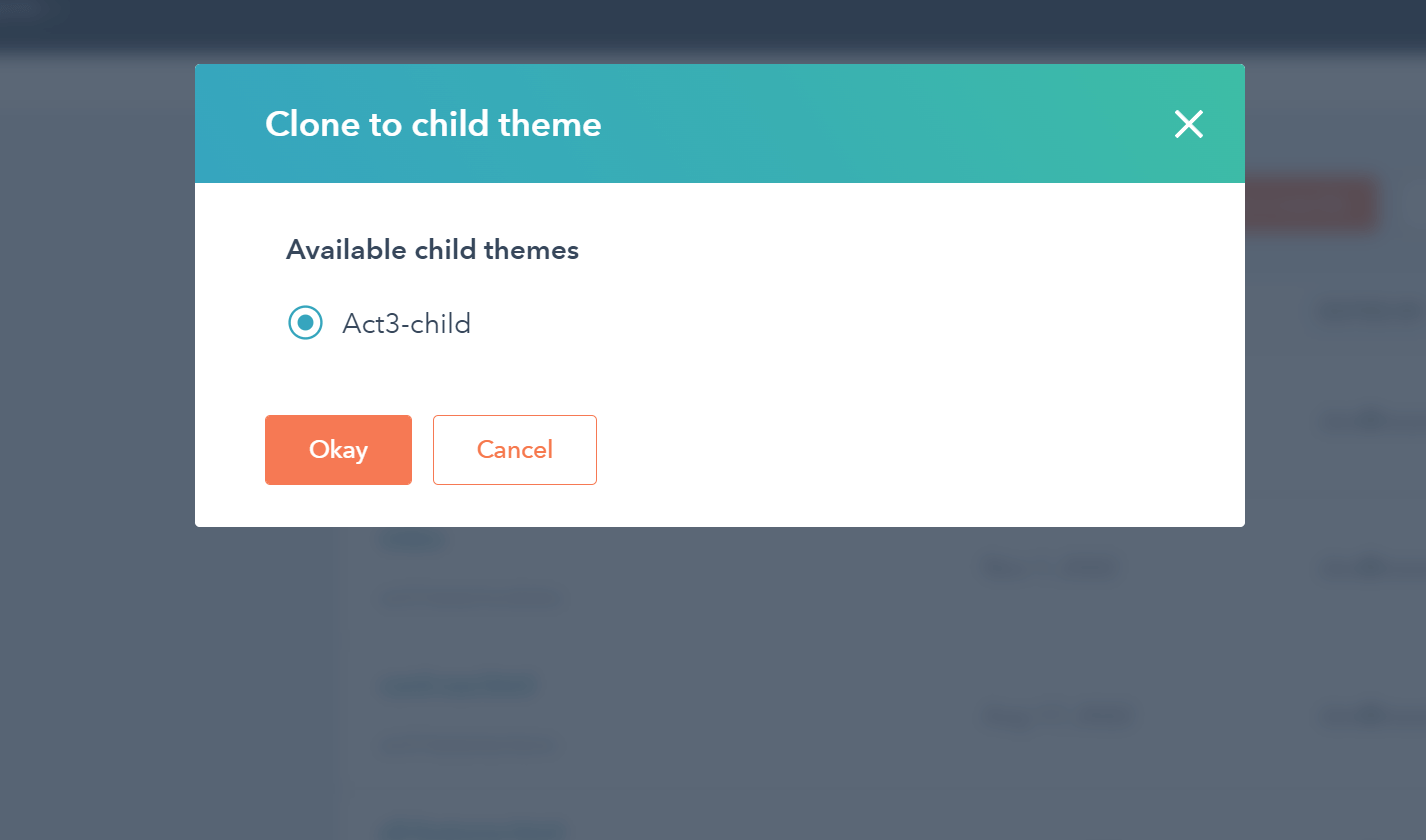
The first step is to clone your desired template (e.g. blog-2-post.html) to your child theme. To do that, just go to the original template in the parent theme (@marketplace/Neambo/Act3/templates), right-click and Clone to child theme:
2. Create a partials folder in your child theme
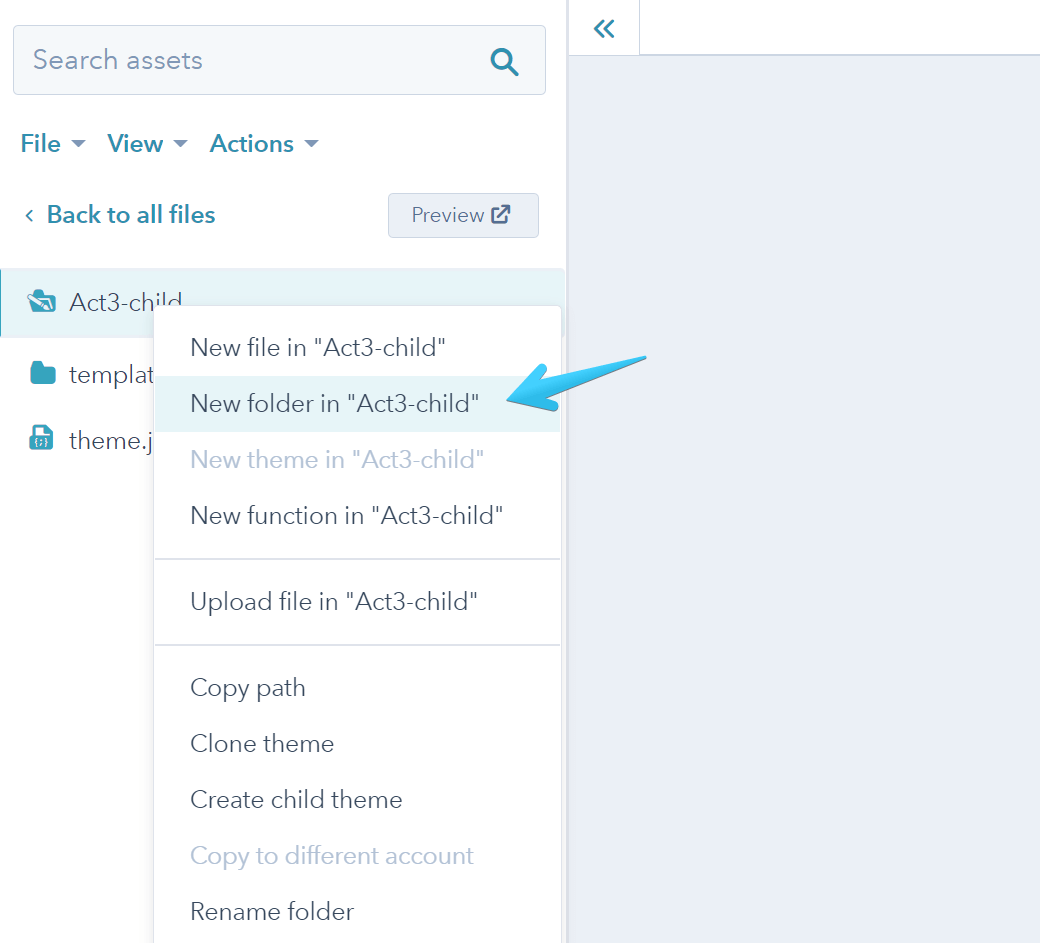
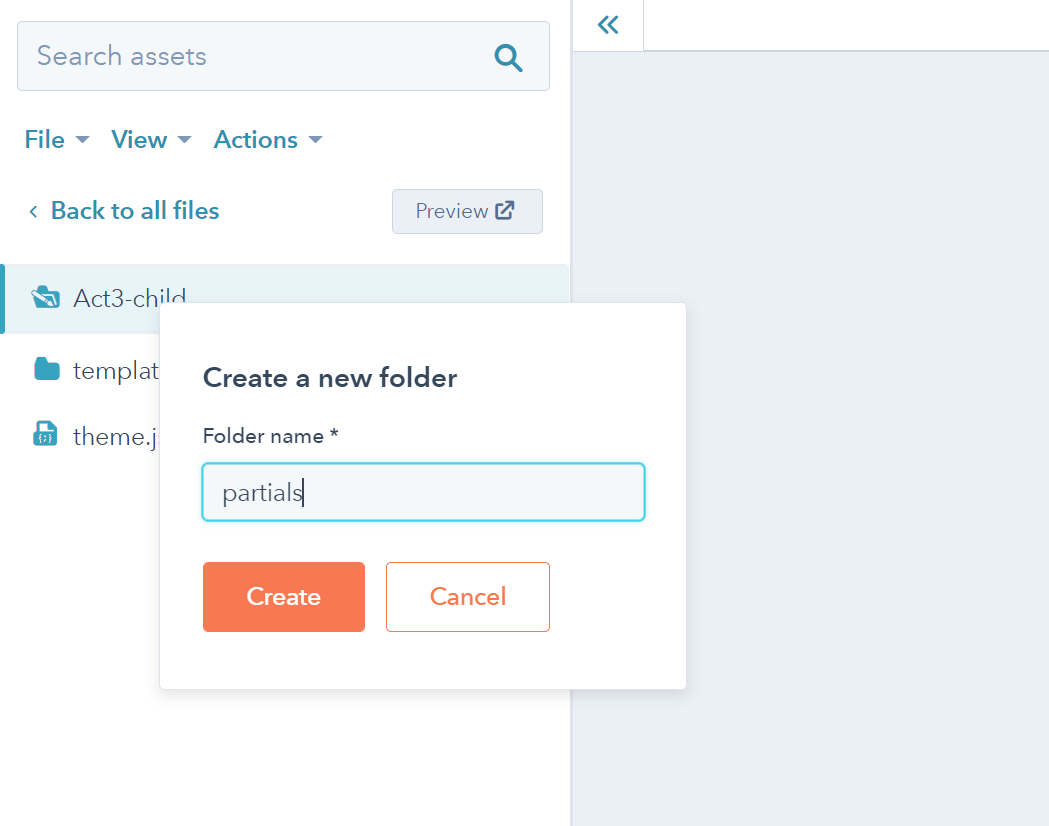
If you don't already have the partials folder in your child theme, you can create it by right-clicking the theme's main folder and choosing to create a new folder:
3. Create a new global partial in your partials folder
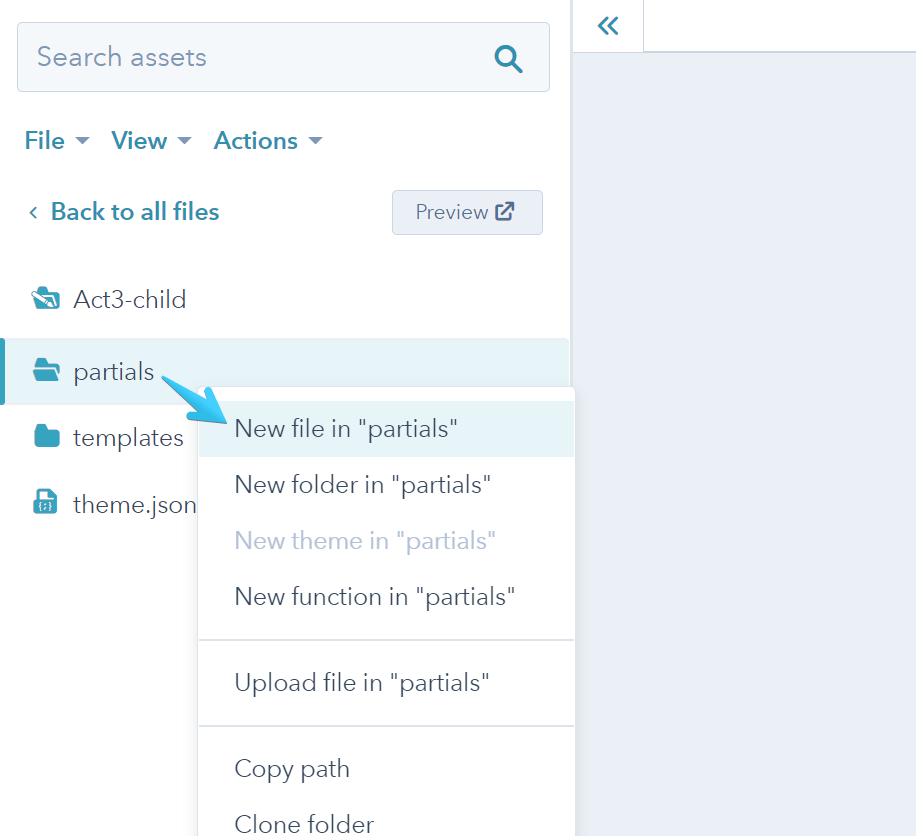
Right-click your partials folder and create a new file:
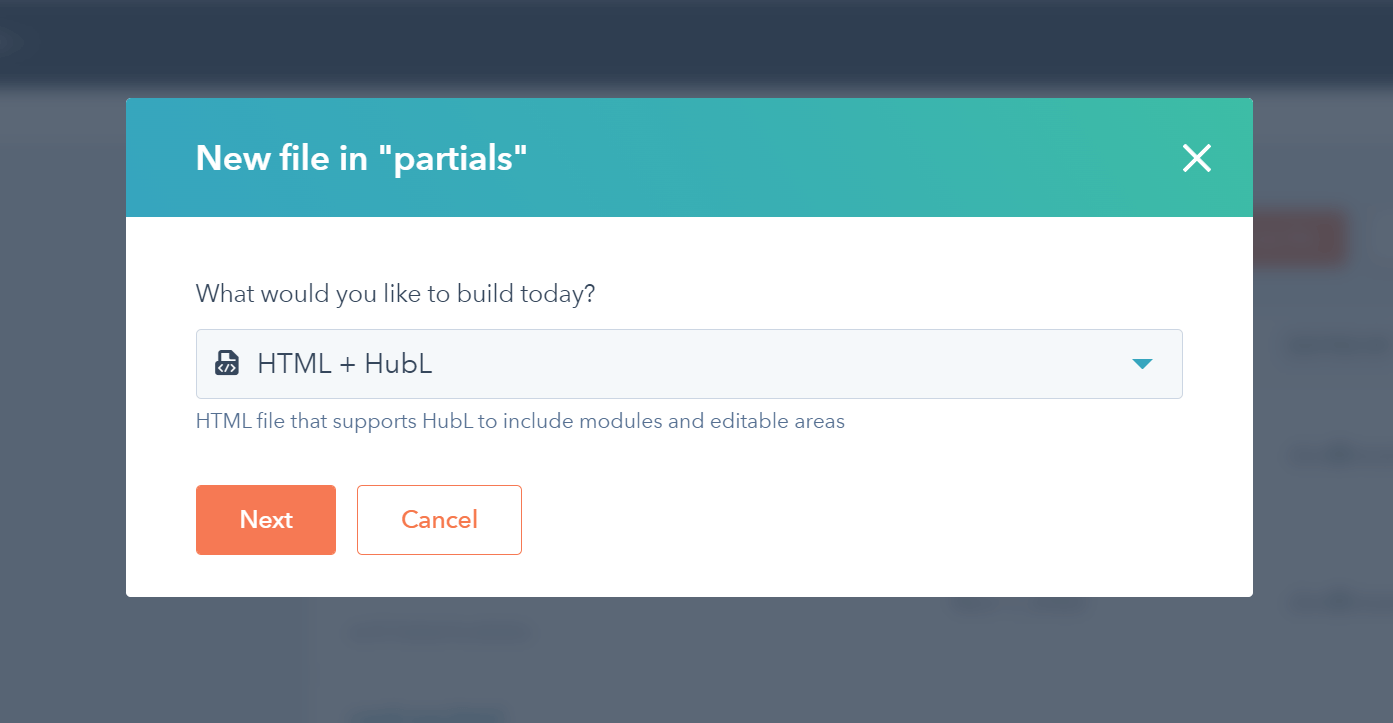
Make sure HTML + HubL is selected:
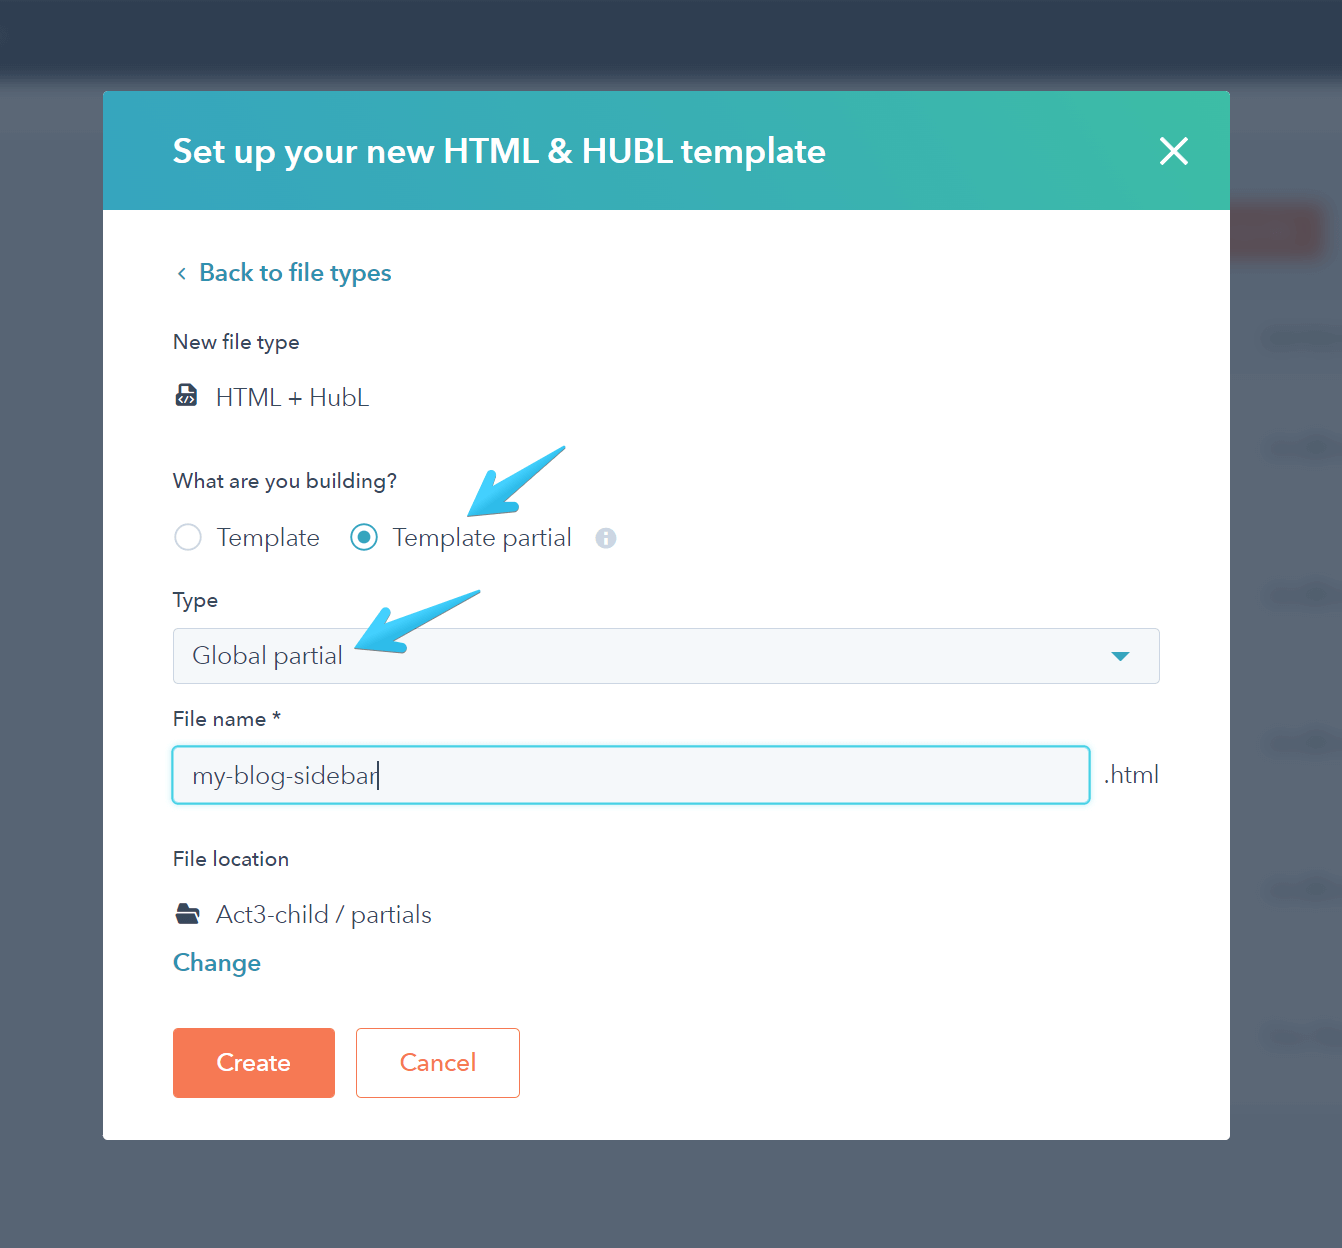
Select the Template partial and Global partial options, and give your new file a name:
4. Add this code to your global partial
Edit your file and replace everything inside with this code:
<!--
  templateType: global_partial
  label: My Blog Sidebar
-->
{% dnd_area 'blog_sidebar' %}{% end_dnd_area %}
You can replace My Blog Sidebar with whatever name you want. And don't forget to publish your changes.
5. Include the global partial in your blog template
Edit the blog template you created at Step 1, then press Cmd/Ctrl + F to search the code for sidebar content:
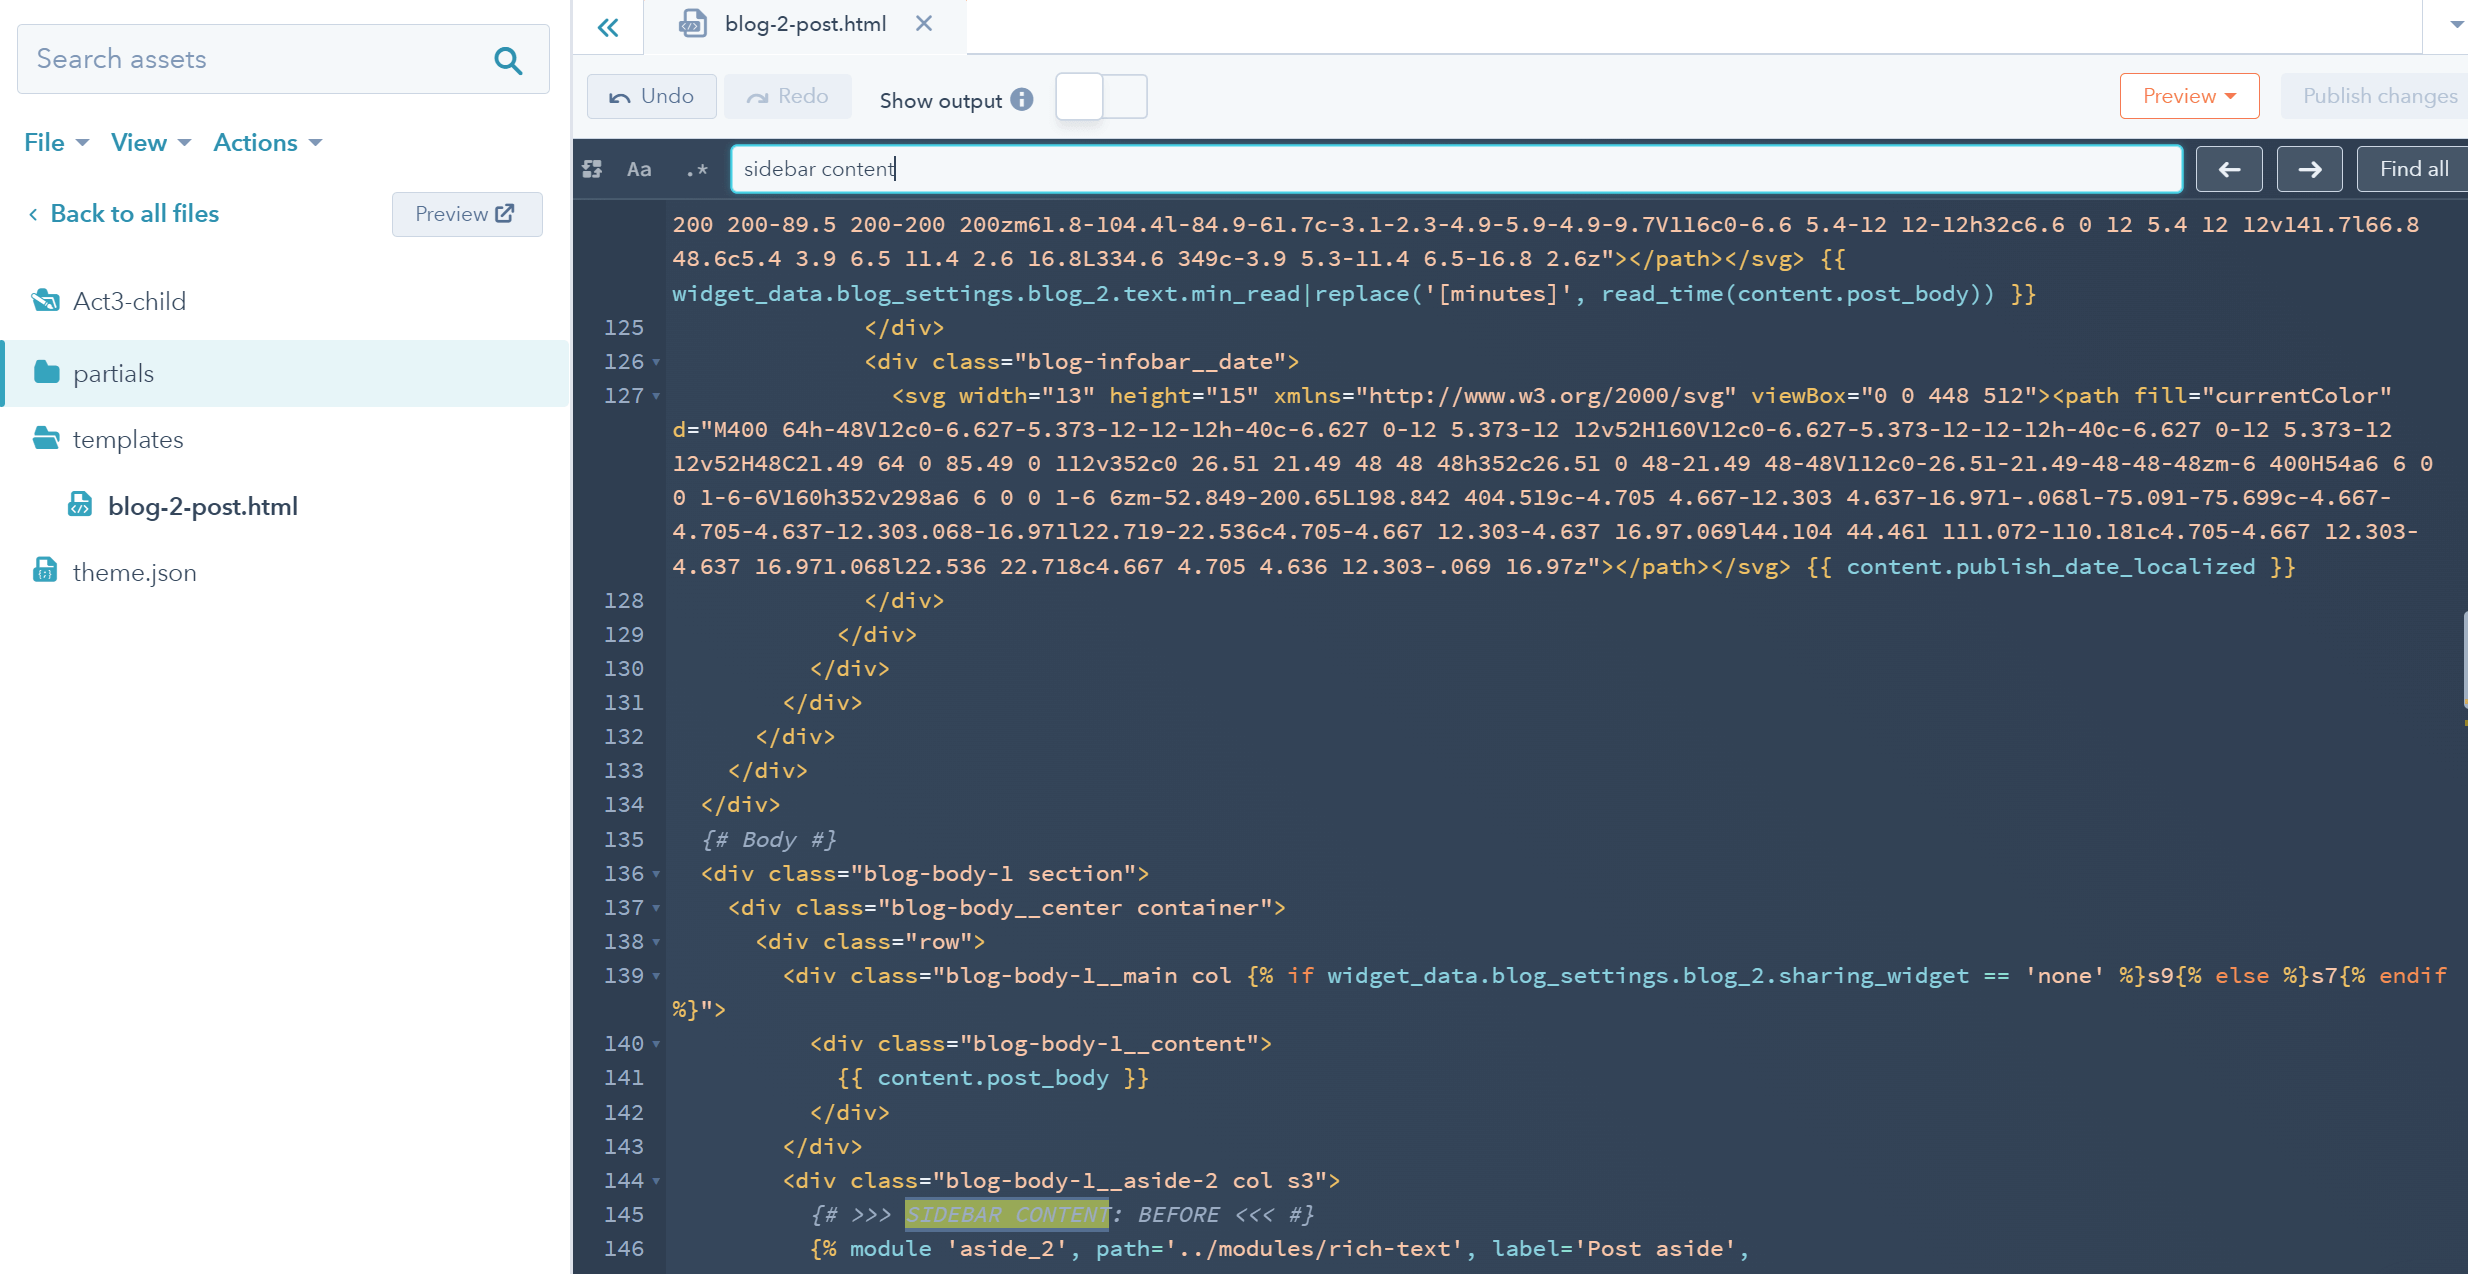
There will be two occurrences:
{# >>> SIDEBAR CONTENT: BEFORE <<< #}
{# >>> SIDEBAR CONTENT: AFTER <<< #}
If you want to add your global content BEFORE the current content on the sidebar (e.g., before the post aside editable with each post on the Blog 1, Blog 2 or Blog 3 templates; or before the widgets sidebar on the Blog 4), you will have to replace the {# >>> SIDEBAR CONTENT: BEFORE <<< #} line with the code below. Example:

Alternatively, if you want to add your global content AFTER the current content on the sidebar, you will have to replace the {# >>> SIDEBAR CONTENT: AFTER <<< #} with the code below. Example:

This is the code you need to add (replace my-blog-sidebar with the file name you added to your global partial at Step 3):
{% global_partial path='../partials/my-blog-sidebar.html' %}Don't forget to publish your changes.
6. Replace your blog template (if not the same)
You can now edit your blog settings and replace the template with the new one if it doesn't have the same file name. Otherwise the new template will automatically be used.
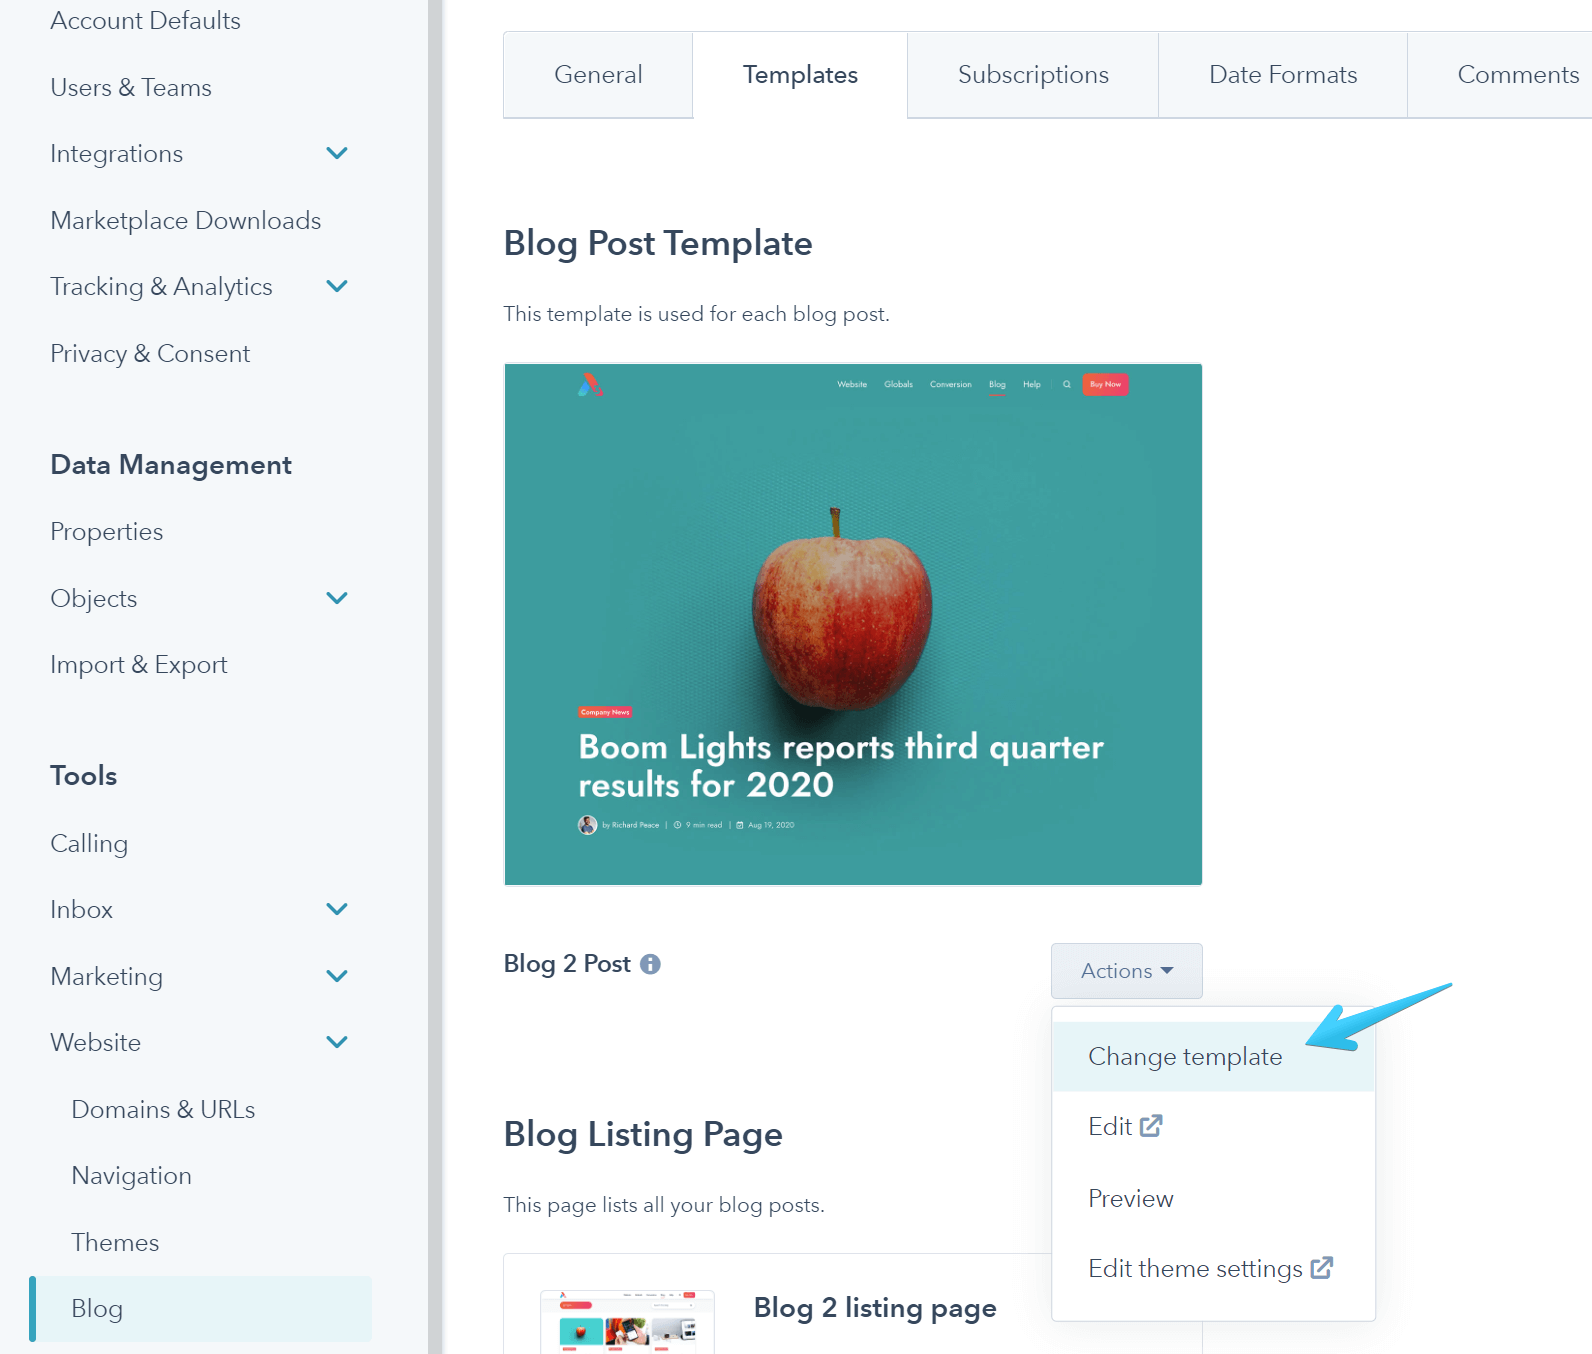
7. Edit and publish your sidebar global content
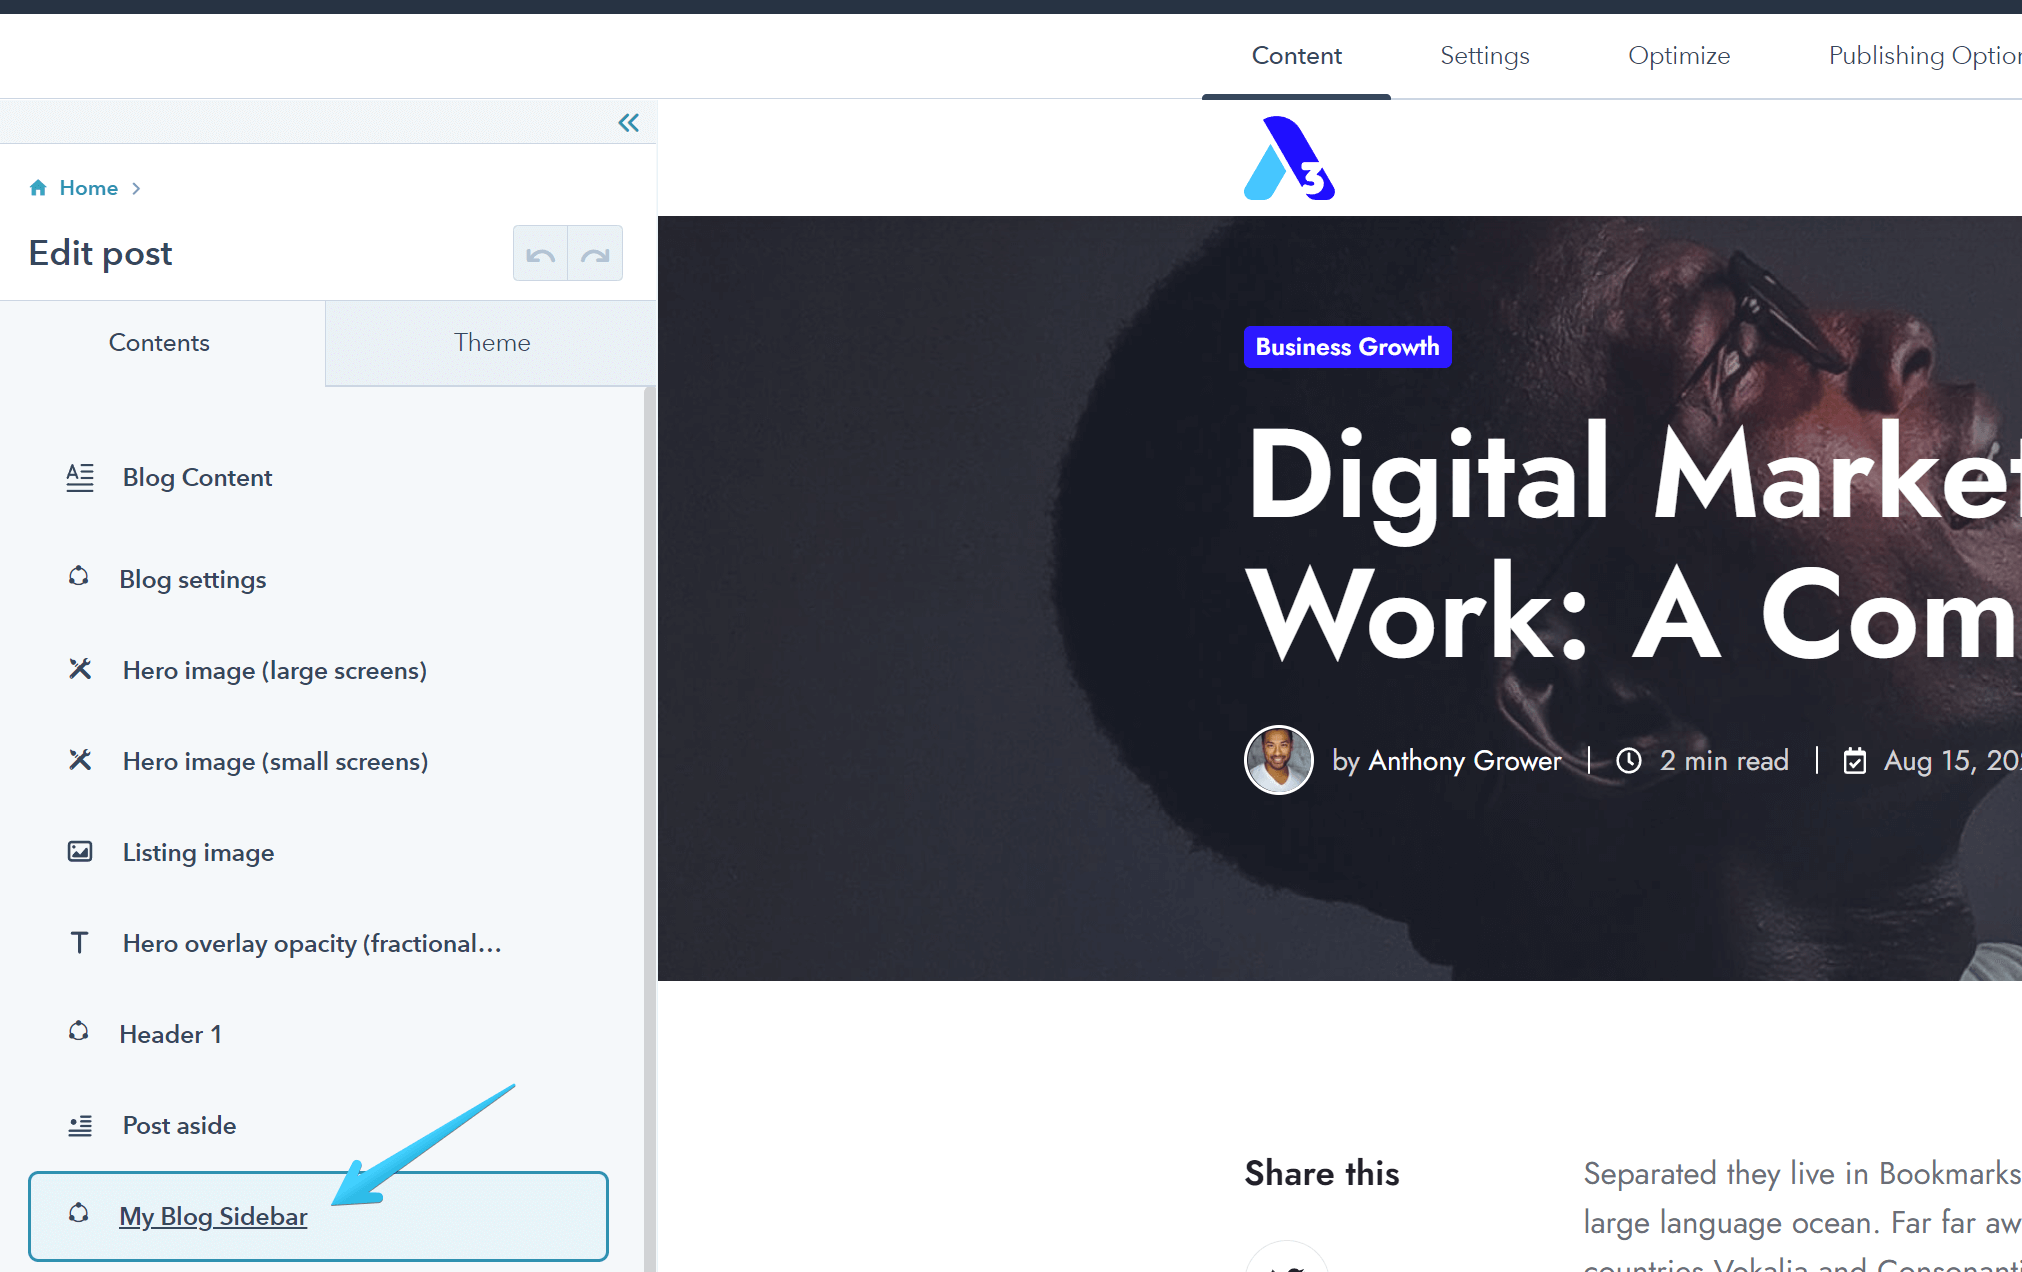
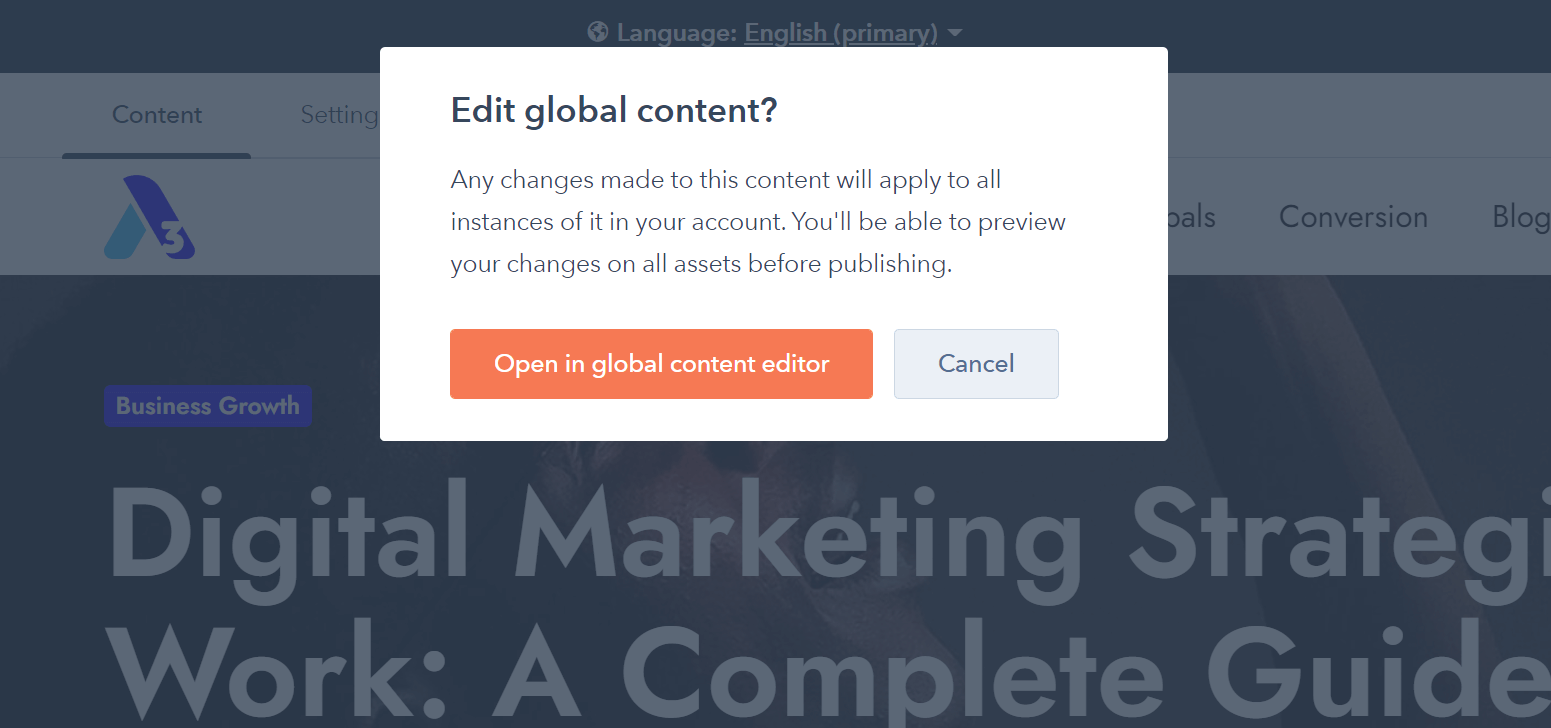
Edit any blog post and open the sidebar in the global editor. The name of your global sidebar may differ (Step 4).
Once in the global editor, you can add modules in the sidebar:
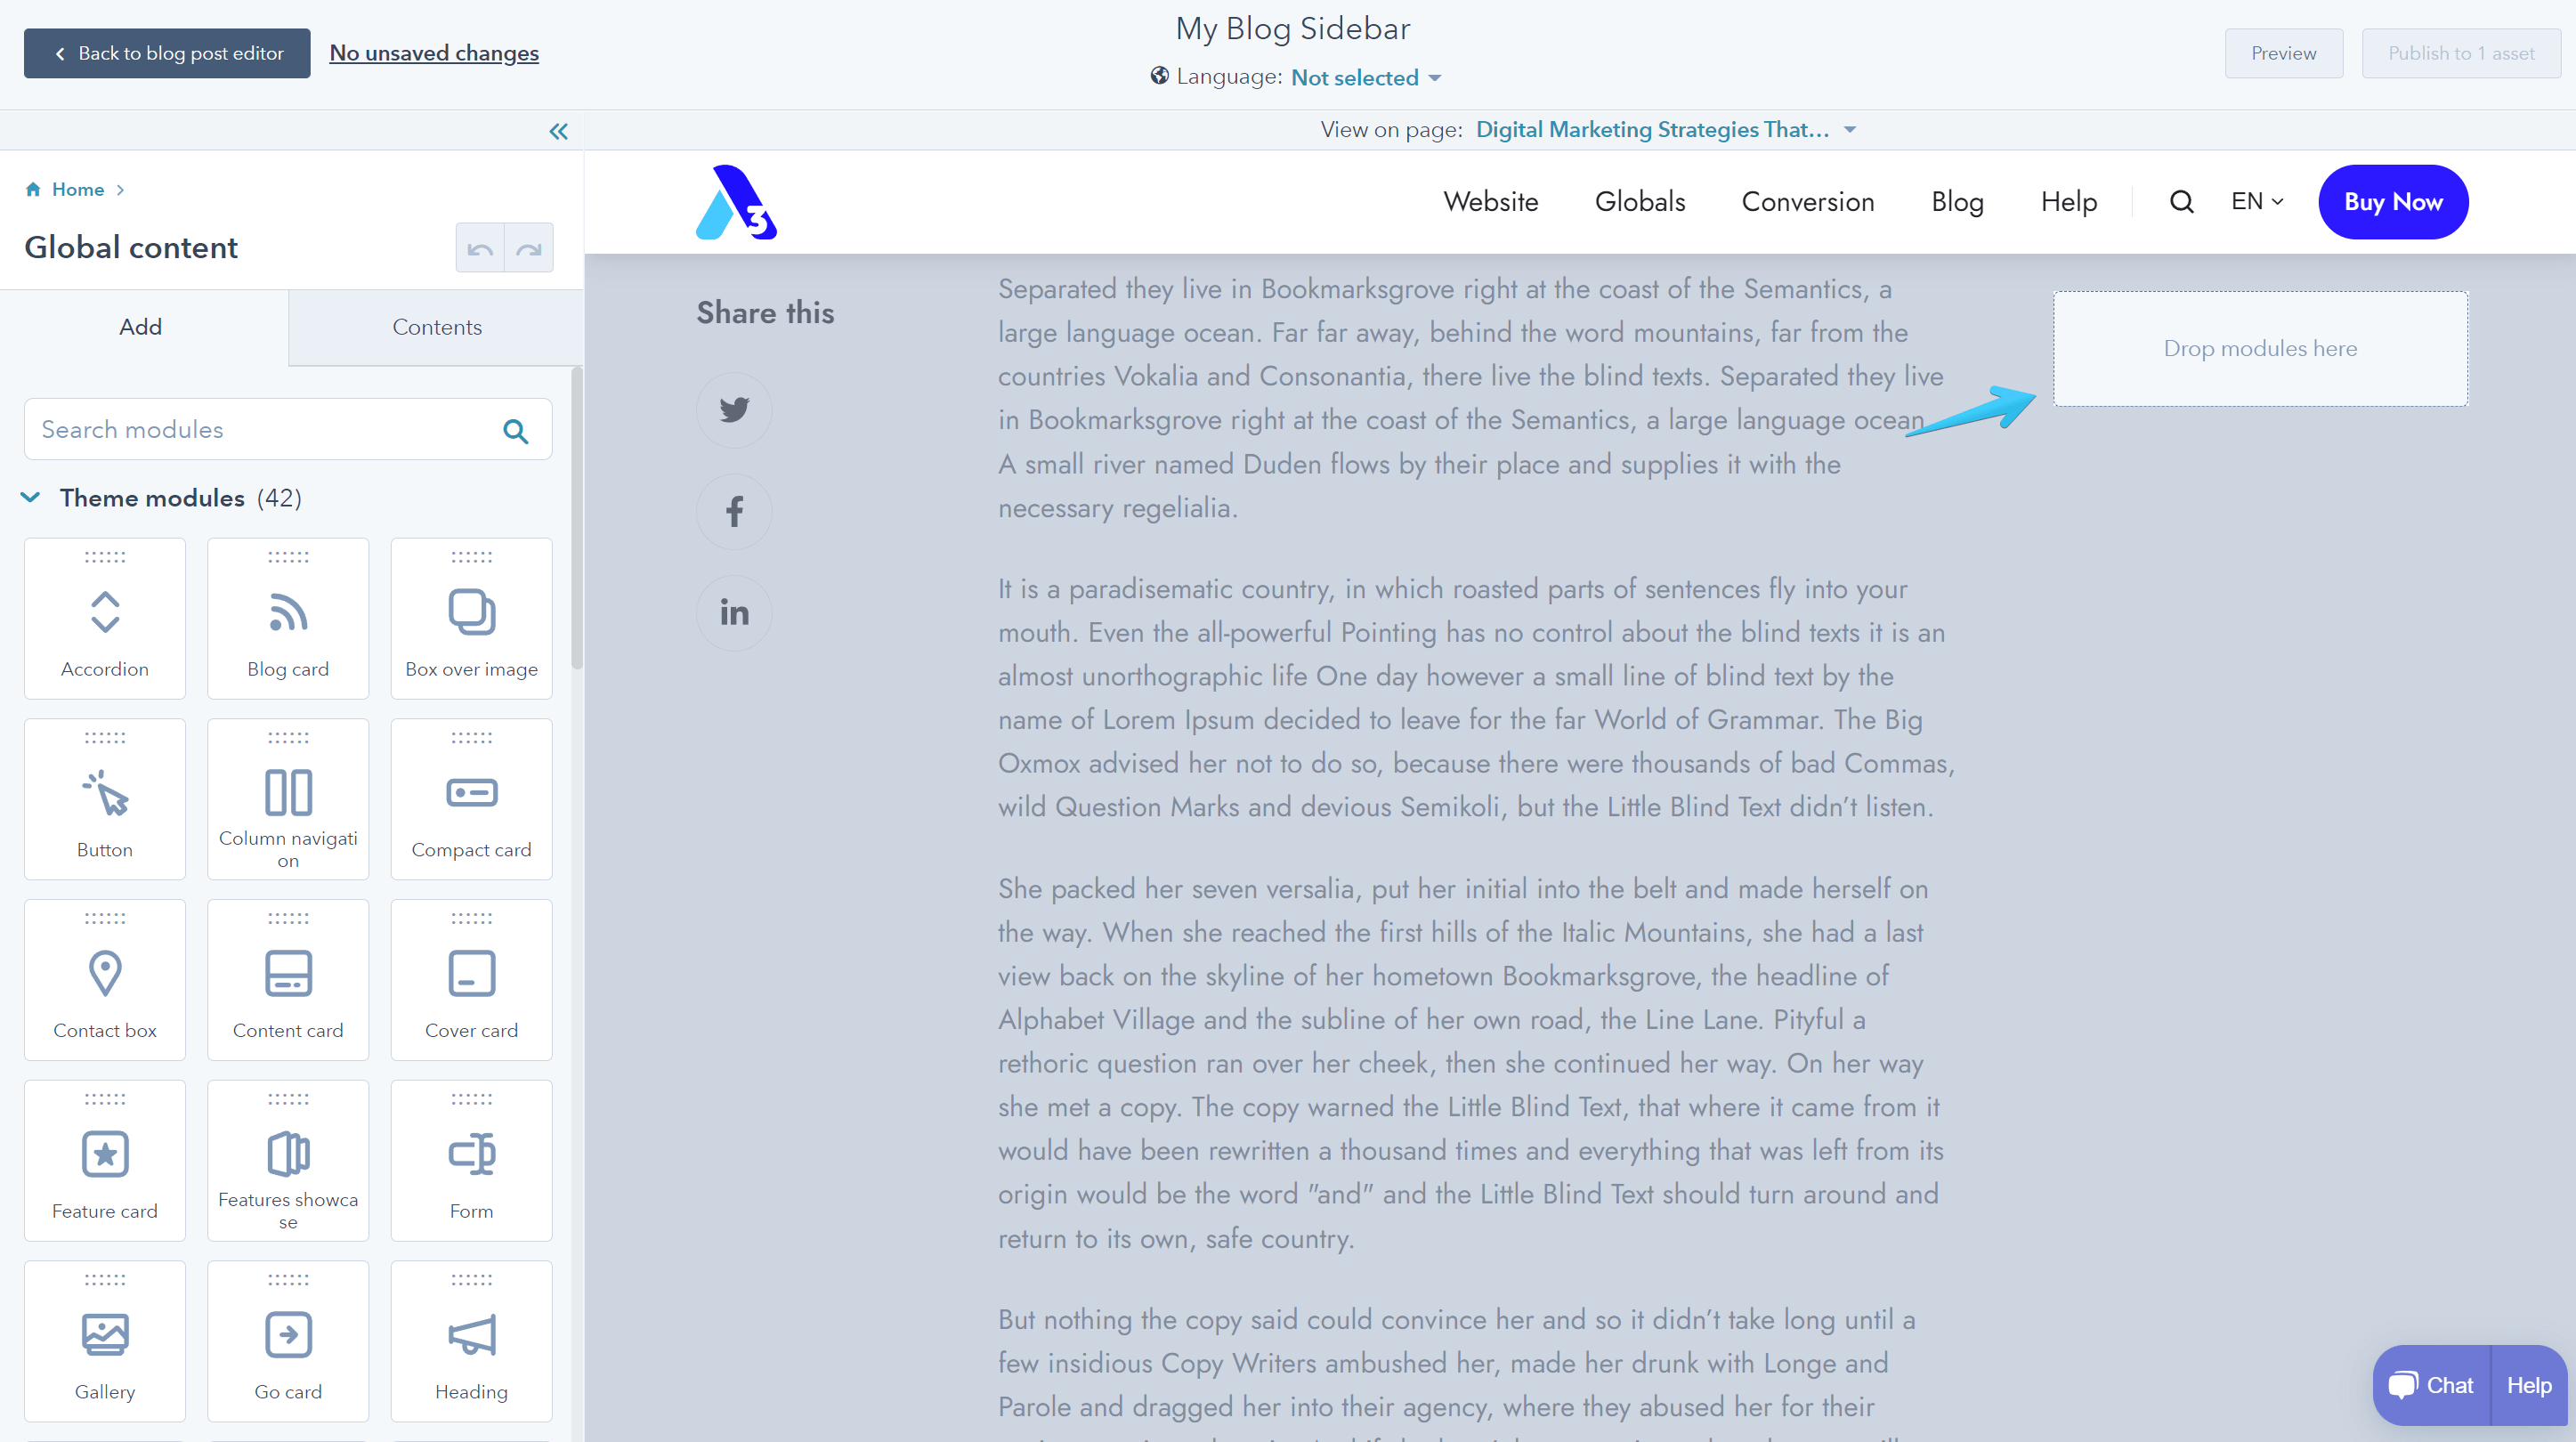
This works like any other drag and drop area, so please make sure to remove the large padding applied by default to the section:
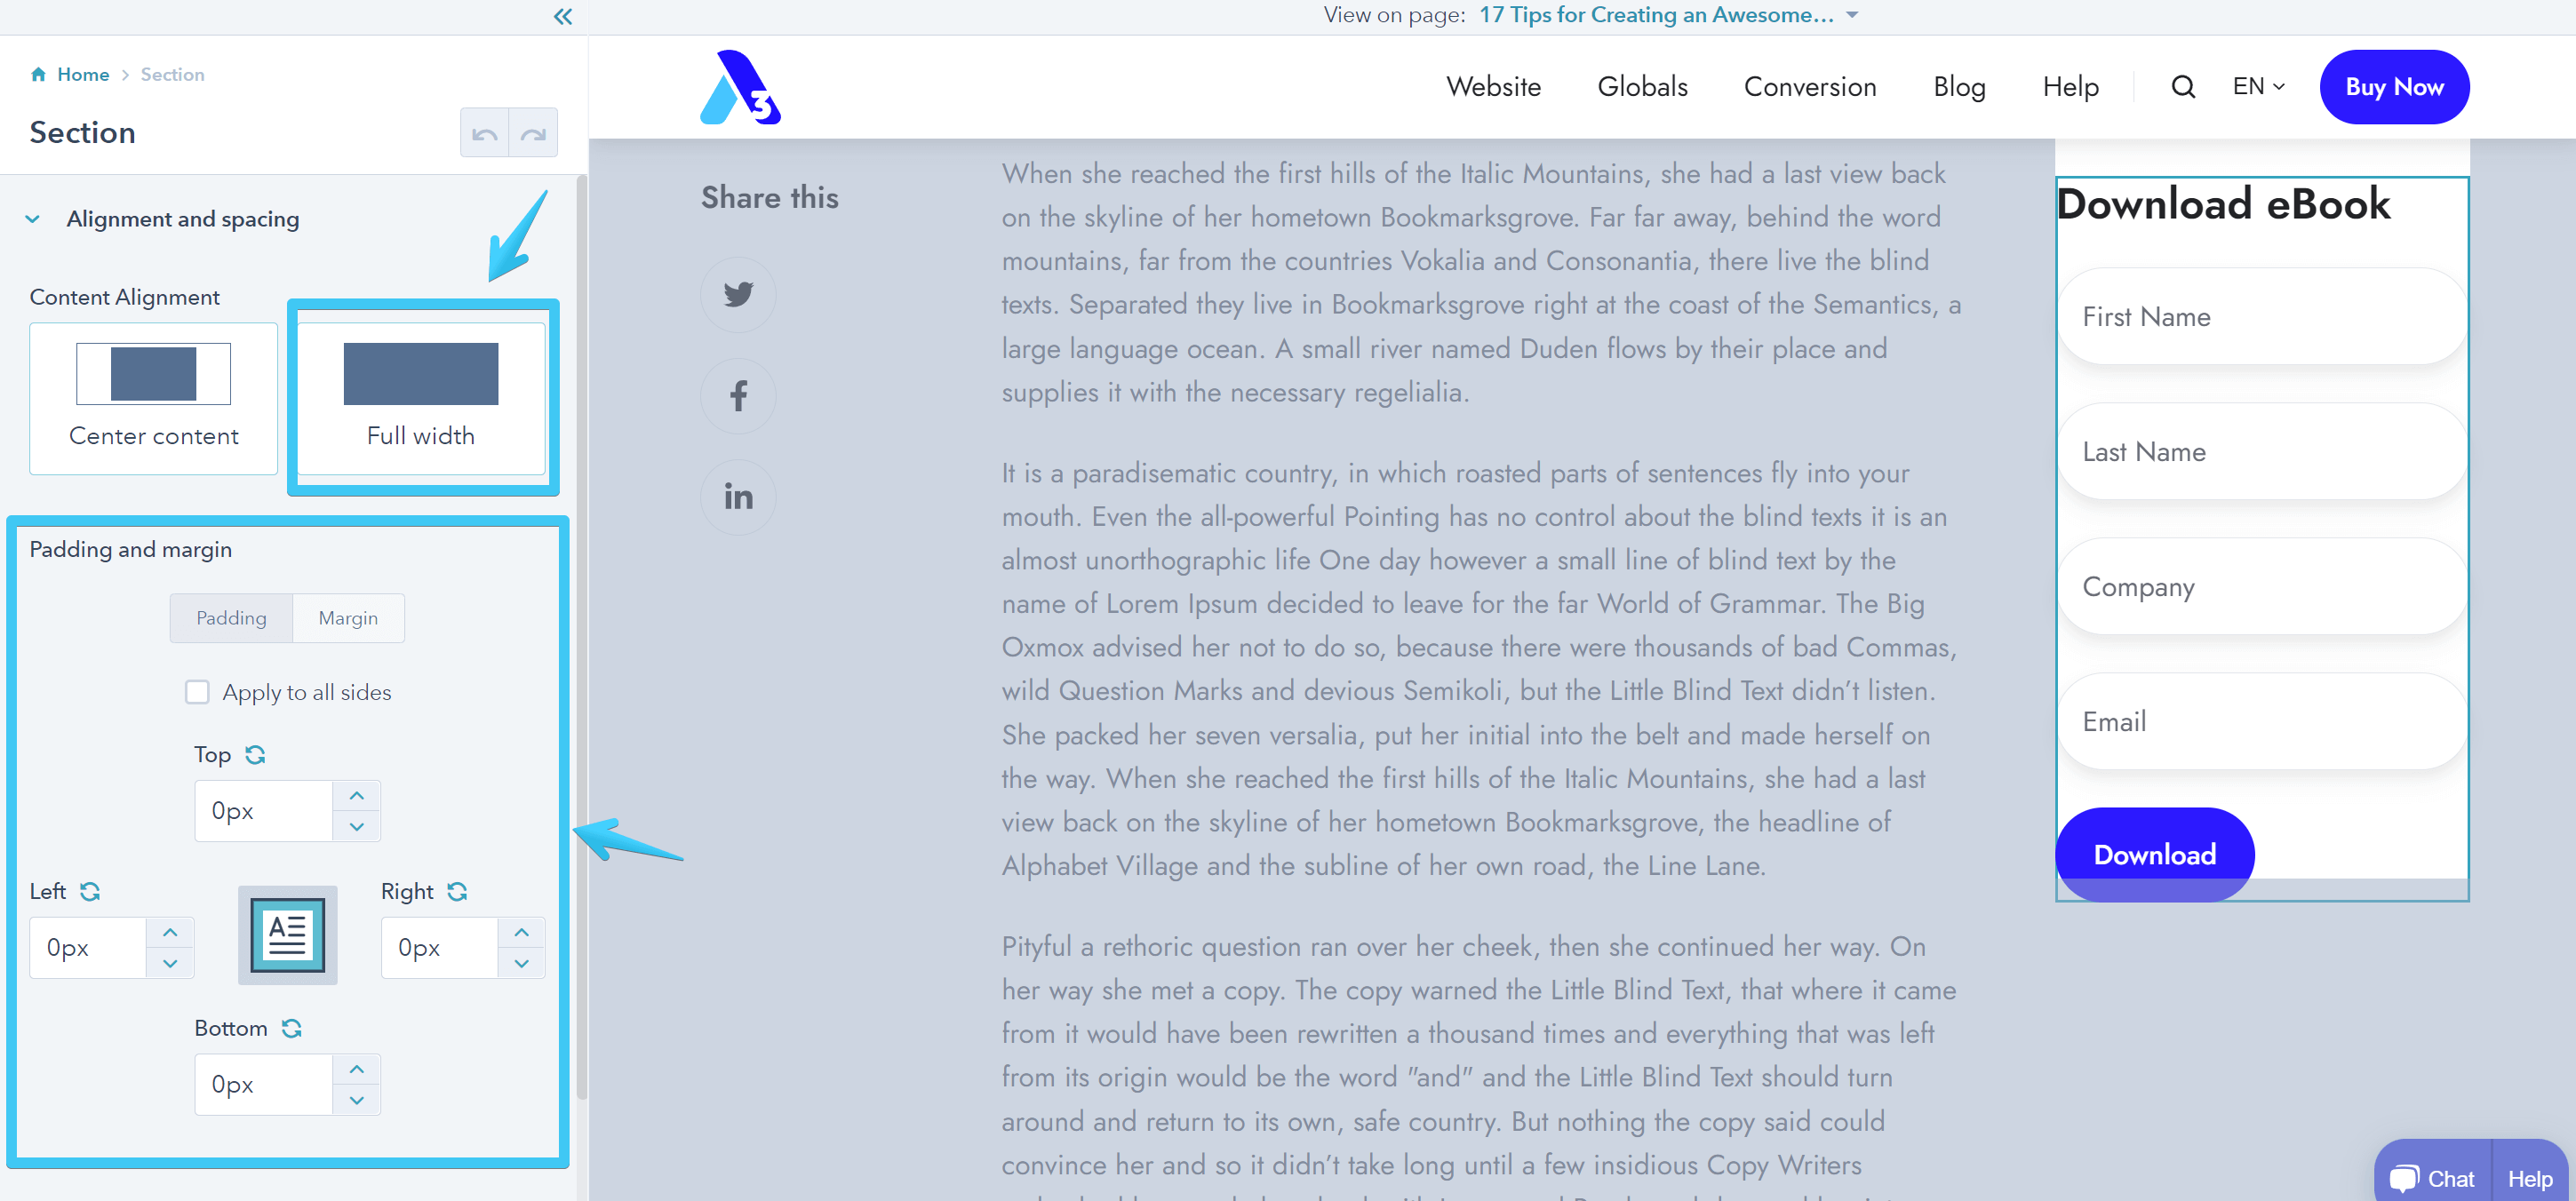
Because the space is limited, please also avoid adding multiple columns or content that doesn't fit.
Once ready, make sure to publish your changes. This content will now appear live on all your blog posts. Example:
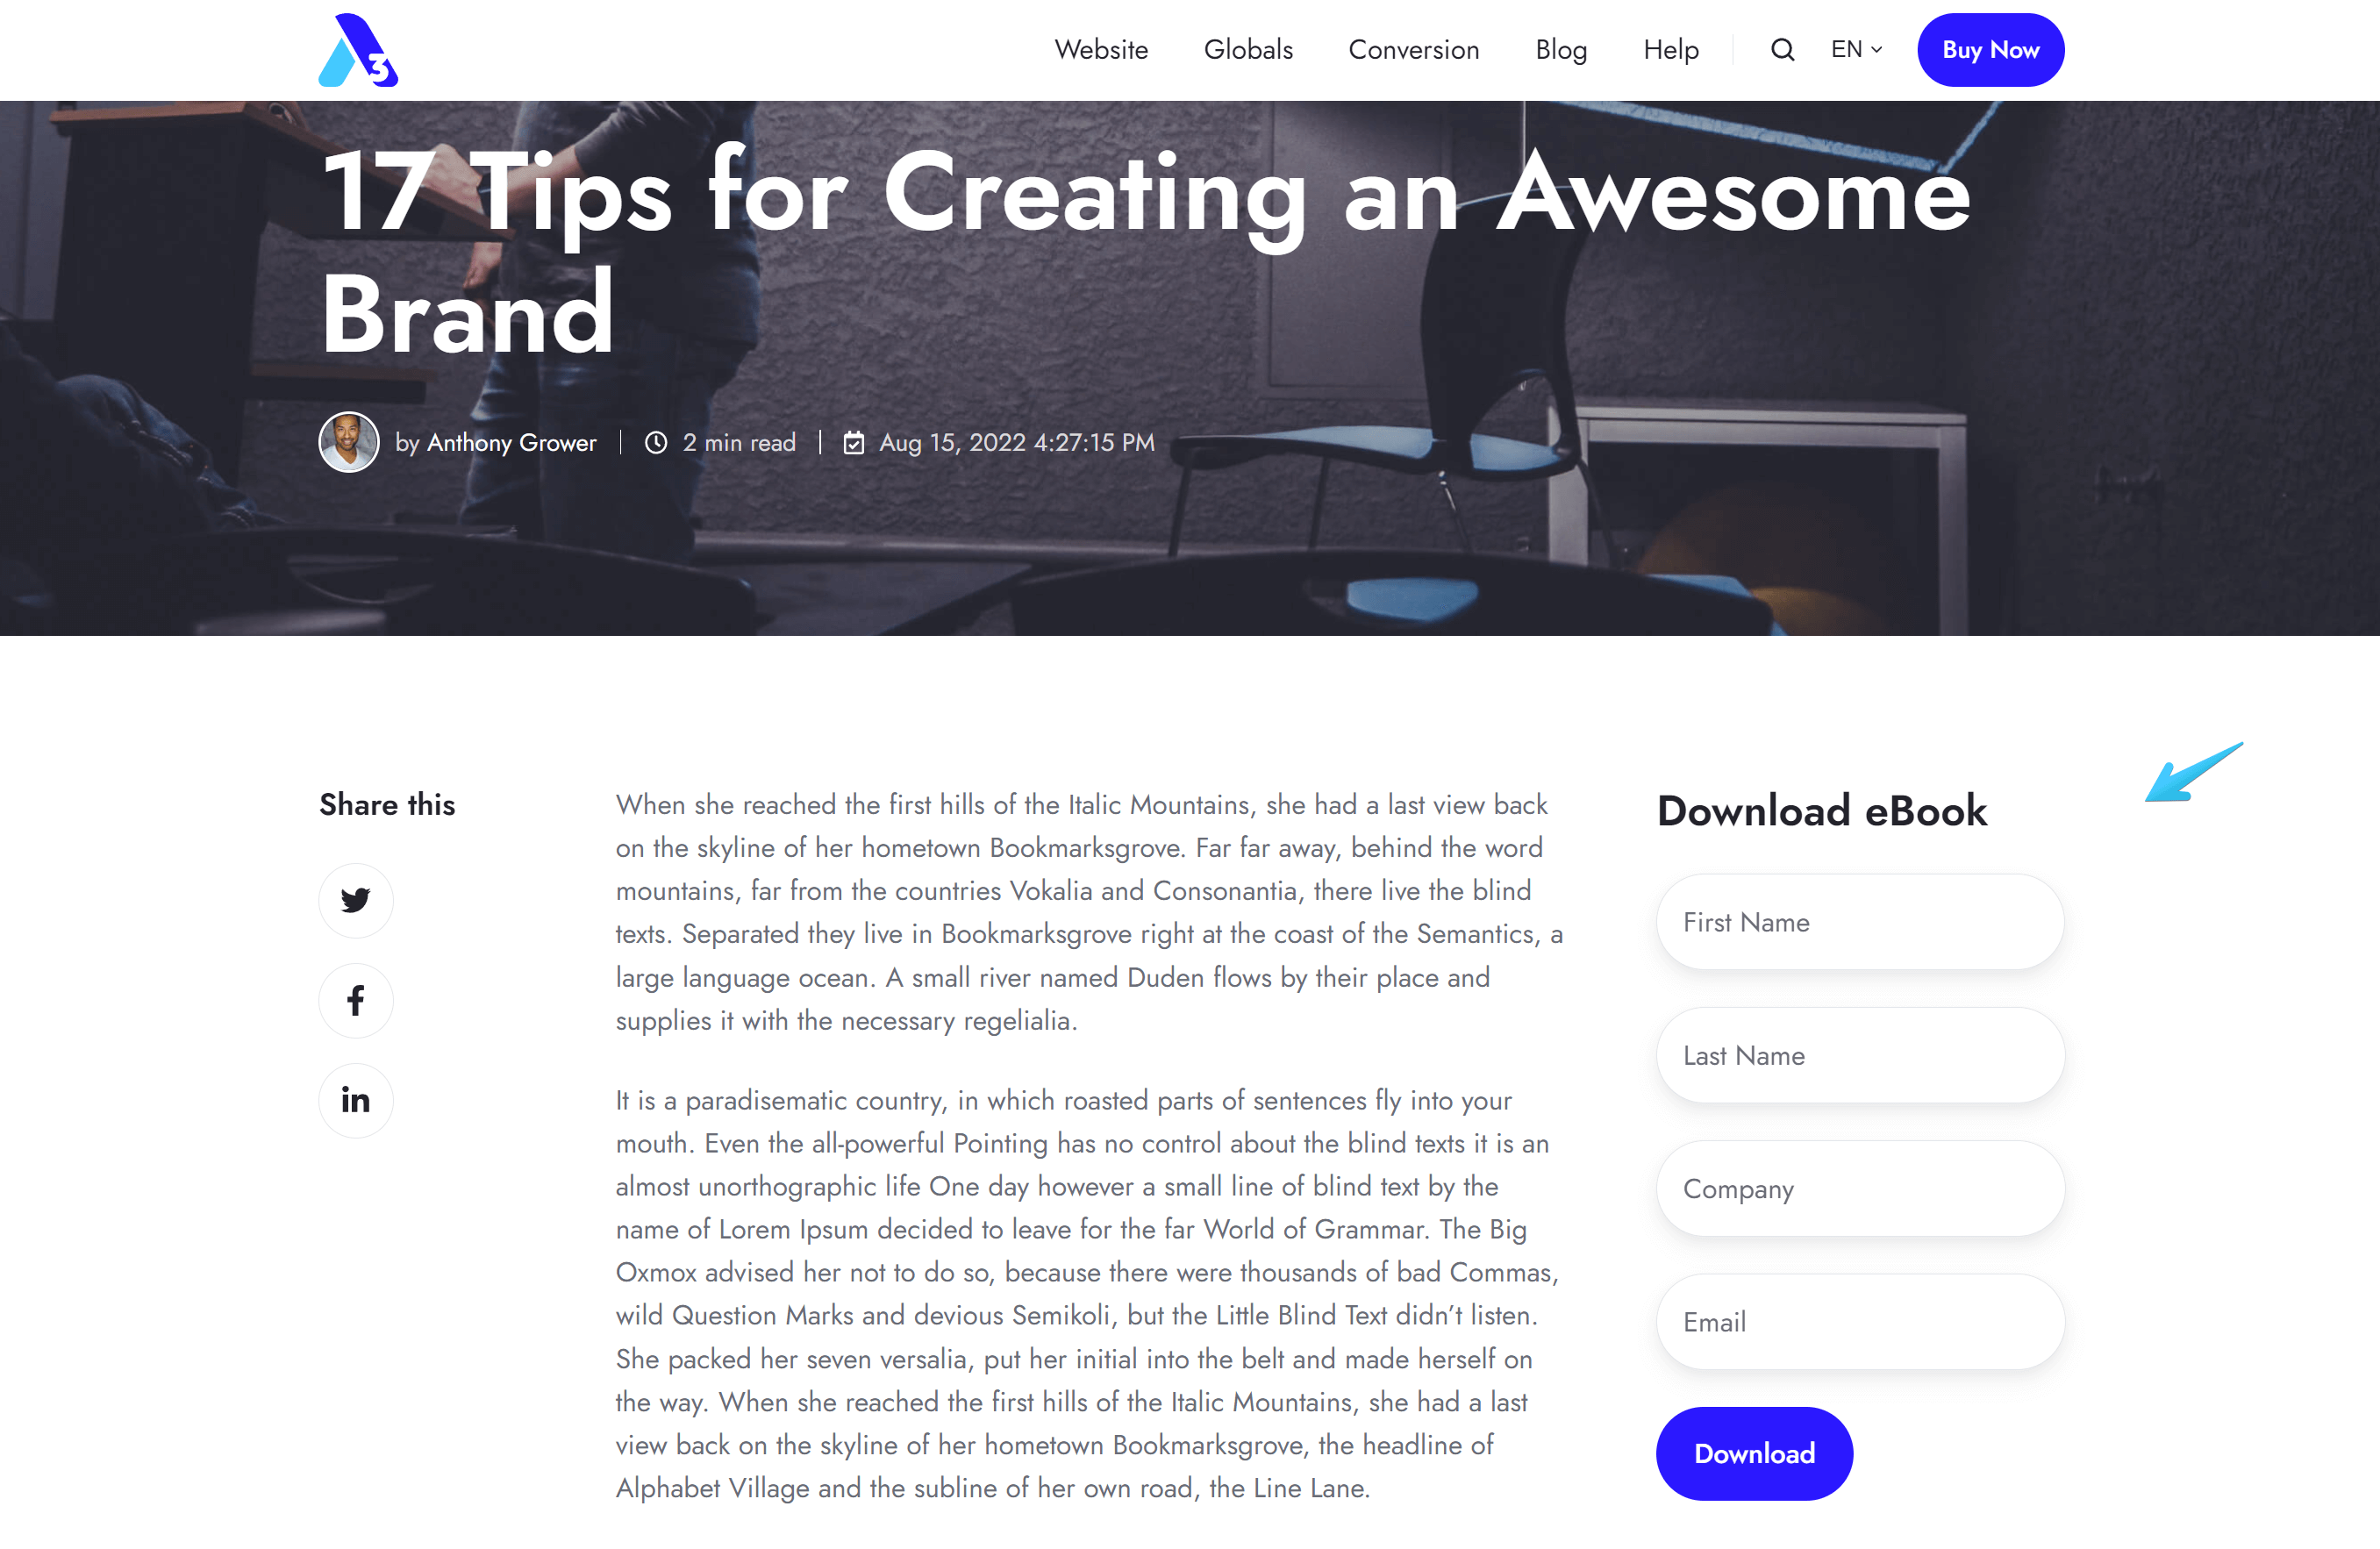
Here is a quick video demonstrating all this process: