How to add a logo in the Sticky Menu
![]()
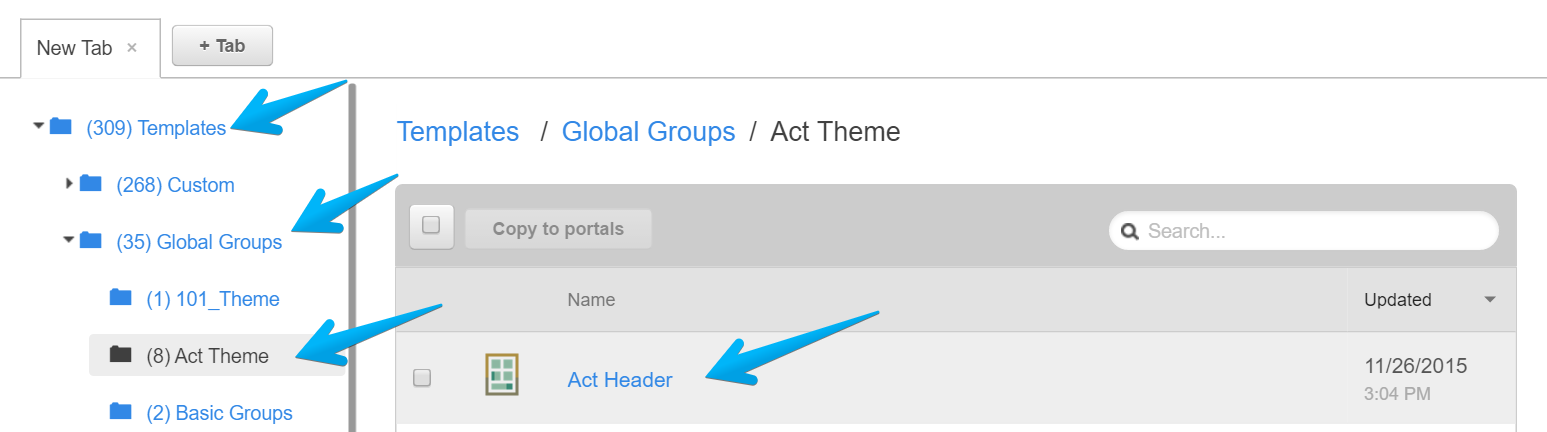
Go to Design Manager in HubSpot and open your Act Header global group:
Add a Custom HTML module below your logo and menu:
![]()
Edit your new Custom HTML module and copy/paste the code below, then change your image URL path, alt text, adjust the size and top margin. Edit only what is highlighted:
<!-- Append sticky menu logo --> <script> $(function() { if ($('.main-navigation.sticky').length > 0) { // wait until the sticky menu is appended - the loop starts only if the sticky menu is available var lookupInterval = setInterval(function() { if ($('.sticky-menu .centered').length > 0) { clearInterval(lookupInterval); $('.sticky-menu .centered').addClass('align-right').prepend('<a href="{{ company_domain }}" class="sticky-menu-logo"><img src="//cdn2.hubspot.net/hub/XYZ/file-2463580000-png/images/logo.png" alt="Alt text" style="float: left; margin-top:5px; width:40px;"></a>'); } }, 100); } }); </script>
By default, the logo links to your domain set in Content Settings > Page Publishing. If you want to change that, you can replace the {{ company_domain }} above with a valid URL. Example: https://neambo.com